Choc-Chip Sweet Potato Cookies

Sweet Potato Choc Chip Cookies 1

If you’ve read my Joburg recommendations in the “Two Kitchens Loves” page, you’ll know that I am a big fan of the Organic Emporium in Bryanston. It has replaced regular supermarkets for my day-to-day grocery shopping. The owner, Debbie, is so passionate about the work she does, it’s hard not to get caught up in her enthusiasm!

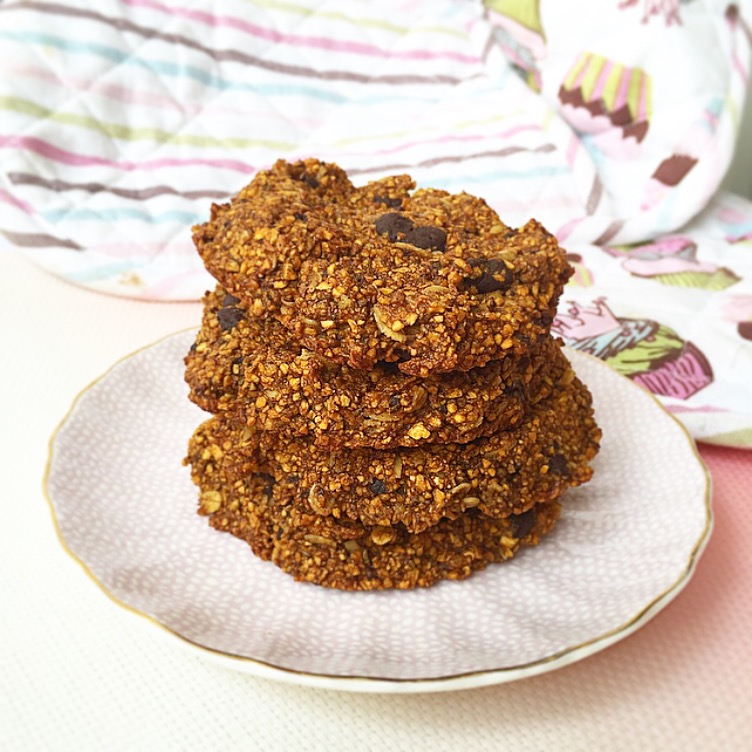
Last week I was in the store and Debbie asked me to come up with a recipe for Wensleydale’s new organic Sweet Potato Flour. I made these gluten, sugar and dairy-free choc-chip cookies. They’ve been really popular with everyone’s who’s taste-tested them for me!

Sweet potatoes are naturally gluten-free and low-GI so the flour makes a great substitute for regular wheat flour. It is quite granular, so it gives the cookies a chunky texture. If you’d prefer a smoother texture you can grind the flour more finely in a blender. In the first batch I used a combination of honey and coconut sugar to sweeten; and in the second batch I replaced the coconut sugar with organic stevia leaf powder. Both worked equally well, so it’s just a matter of preference. If you’re watching calories I would recommend using the stevia.

Ingredients (makes about 20 cookies)

1/4 cup organic virgin coconut oil
1/4 cup organic coconut sugar OR 1/2 tsp organic stevia leaf powder
2 tbsp raw honey
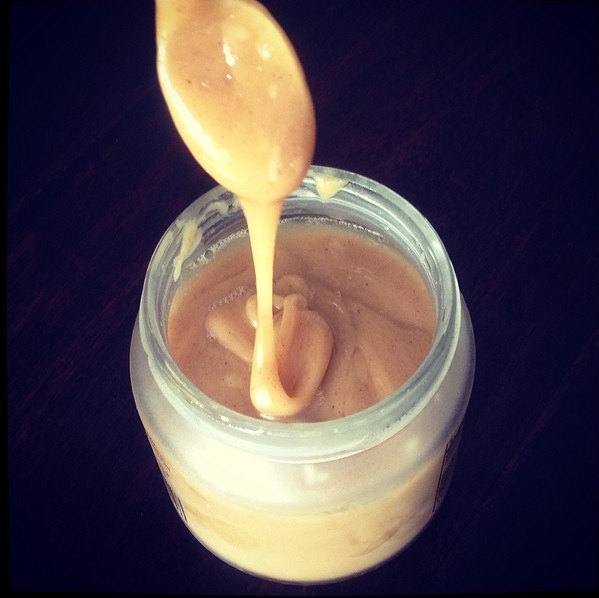
2 tbsp nut butter (peanut, almond, cashew etc)
2 farm-raised eggs
1/4 tsp organic vanilla powder OR 1/2 tsp vanilla extract
1/4 tsp himalayan salt
1 tsp bicarbonate of soda
1 ripe banana, finely mashed with a fork
1/2 cup water
1/2 cup rolled oats
75g Gayleen’s Decadence Raw Chocolate Baking Slab, available at the Organic Emporium
1 1/2 cup Wensleydale’s Sweet Potato Flour, available at the Organic Emporium

Method

Preheat the oven to 180 C.

Make sure that the raw chocolate is cold from the fridge. Chop it up into small pieces for your “chocolate chips” and then return to the fridge. If left at room temperature it may start to melt.

Beat together the oil, coconut sugar or stevia, honey and nut butter. Add the eggs and beat well. Stir in the vanilla, salt, bicarb, banana and water. Add the oats and chocolate chips. Now stir in the sweet potato flour. You will notice that the flour is very “thirsty” and the dough will thicken quite quickly. Stir well so that there are no dry lumps of flour.

Line a large baking tray with silicone mats or baking paper. Place a heaped tablespoon of dough onto the tray and spread out into a neat circle, about 1.5cm thick. You can wet your fingers to prevent the dough from sticking to them. Repeat till all the dough is used up. The cookies will not spread during baking, so you can place them quite close together.

Bake for 15 – 20 minutes, until slightly golden and firm to the touch. Allow to cool completely before storing in an airtight container.

Health & happiness!

Love,
Raine

Simple Homemade Tomato Sauce

tomato sauce

Every freezer should be stocked with this simple and healthy tomato sauce – it can be used in a myriad of different dishes, and makes life easier for busy moms! Just got home from work and need to make dinner in under half an hour? Defrost this sauce and serve it with some buckwheat or quinoa pasta for a quick but still nutritious family meal.

Tomatoes are high in vitamin C and antioxidants, particularly lycopene. Researchers recently found a connection between tomatoes and bone health, concluding that tomatoes can help to prevent osteoporosis. They are also important for heart health, and have long been hailed as the anti-prostate cancer food of choice.

I like to make up a batch of this sauce and then freeze some of it in ice trays, so that I have small portions handy for my son’s meals (I use 2 – 3 cubes for him) and freeze the rest in one portion for a family meal.

IMG_0301

Ingredients

2 large onions, chopped
1 tbsp extra virgin olive oil
6 large cloves of garlic
1/2 cup of red wine (optional)
1.3kg fresh tomatoes, roughly chopped, including seeds
small handful of fresh thyme
2 bay leaves
1/4 cup dried dates
3/4 tsp himalayan salt
a few leaves of fresh basil

Method

Fry the onions in the olive oil until caramelised. Add the garlic and fry for 2 minutes. Add the wine. There should immediately be a cloud of steam, and a strong smell of alcohol. This is the alcohol in the wine cooking off – so don’t worry, there won’t be any alcohol left over in the sauce. You can omit the wine, but it adds depth of flavour.

Add the tomatoes, thyme, bay leaves and dates. Turn the heat down, cover with a lid and simmer for a minimum of 30 minutes. An hour or longer is better – the longer it simmers the more the flavours develop.

Remove the hard stalks of the thyme and then put the sauce in a blender or food processor. For pasta sauces I like a chunkier texture so will use a food processor. For a smoother sauce (for example, for pizza) use a blender. Add the salt and basil and blend until you have the desired consistency. Taste for seasoning and adjust accordingly. Traditionally tomato sauce would have quite a bit of sugar added (you’d be mortified to learn how much sugar there is in store-bought tomato sauce or ketchup!) I avoid this by adding the dates. If you feel that it needs more sweetness, add more dates or raw honey or organic maple syrup. If you feel that it needs more acidity, use fresh lemon or organic apple cider vinegar. This all depends on the natural flavour of the tomatoes you’ve used, so just taste and see!

Use immediately or freeze for future use.

Below are examples of how I would use this sauce:

tomato sauce 2

Here I roasted some aubergine with olive oil, salt and black pepper. I added it to the sauce along with some fresh chilli and basil. Served with buckwheat pasta.

IMG_0299

I fried onion, garlic, carrot, red pepper, broccoli and chilli in olive oil. I added the sauce, cooked brown basmati rice, shredded poached chicken and fresh coriander.

Health & happiness!

Love,
Raine

Chai Ginger Snap Cookies

Chai Ginger Snap Cookies 1

I love the flavour of my vanilla chai tea from Pukka, and I used it when I made my healthy pumpkin pie for Thanksgiving and it worked a treat so I thought I’d use it for these cookies.

The gingery taste is so yummy to me, and as a true Brit, the first thing I did was dip it into my tea, and it was heaven!

They literally need no more than 8 minutes in the oven. I left mine for 10 and you can see that some of them are a little burnt (still nice dipped into tea though!) So really watch the clock on these…

Ingredients

1/3 cup honey
3 tbsp coconut palm sugar
2 tbsp organic vegan non hydrogenated margarine
1 tbsp coconut oil and extra for greasing
1/2 tsp vanilla extract
5 tbsp almond milk
1 chai or vanilla chai teabag
2 and quarter cups ground almonds
4 heaped tbsp buckwheat flour
1.5 tsp bicarbonate of soda
1 tsp ground cinnamon
1 tsp ground nutmeg
3 tsp ground ginger

Method

Preheat the oven to 180.

Start by putting the honey in a small saucepan over a low heat and leave for around 5 minutes until it bubbles and turns darker. At this point, add the margarine, coco sugar, coconut oil, almond milk and vanilla and mix until well incorporated.

Then add the teabag. Give it a few dunks then remove from the heat and let it steep while you take care of the dry ingredients.


In a bowl add the ground almonds, buckwheat flour, baking soda and the spices and mix well.

Remove the teabag from the honey mixture and pour the wet ingredients over the dry ingredients. Mix very well, making sure you get all the flour from the bottom.

Line a baking tray (you will probably need 2 baking trays) with baking paper, grease with some coconut oil and then here’s the bit that will make this easier for you: put some coconut oil on a tablespoon (so that you don’t dirty the tub of coconut oil) and grease your hands all over. Once your hands are well greased, take a small bit of the mixture in your hands to form a small ball then put it on the baking tray. Do this until the mixture is finished and then wash your hands if they have too much mixture on, dry and re-grease them with coconut oil then flatten them all with your fingers until they are smooth and fairly flat but with a bit of bounce to them.

Bake for 8 minutes. Remove from oven and put on a wire rack to cool.

Enjoy with a turmeric latte for extra anti-inflammatory goodness!

Love and light,
Lauren

Chai Coconut Milk Chia Pudding

chai chia pudding2

That might sound like a mouthful, and it is… a mouthful of deliciousness and health! “Chia” is the ancient Mayan word for “strength” and these little seeds were prized for their ability to provide long-lasting energy. They provide high nutrition for low calories (almost all of their carbohydrates are in the form of fibre) so this is a great food if you’re trying to lose weight. They are high in protein, fibre, Omega 3 fatty acids, calcium, magnesium, phosphorus and antioxidants.

You can sprinkle chia seeds over your breakfast or add them to smoothies, but my favourite way to eat them is by making chia pudding. When you soak these little nutritional powerhouses in liquid, they swell and absorb the liquid. The result is a creamy and delicious pudding. Great for breakfast or dessert… and who doesn’t love dessert for breakfast?!

I prefer to grind my spices fresh in a coffee grinder as the flavour is much more intense, but you could use pre-ground spices if you don’t have whole spices or a coffee grinder.


Ingredients

1 stick of cinnamon (3/4 tsp ground)
1 star anise (1/4 tsp ground)
the seeds of 8 green cardamom pods (1/2 tsp ground)
about 1/5 of a whole nutmeg (1/4 tsp ground)
1/4 tsp Himalayan salt
1 – 2 tbsp raw honey or organic maple syrup
2 cups coconut milk (I make my own but you can use an organic tinned one which contains only coconut and water)
90ml chia seeds
60ml hemp seeds

Method

Firstly, grind the spices until you have a fine powder. Place them in a bowl with the honey and salt and a few drops of the coconut milk. Use a whisk to dissolve the honey, and then add the rest of the coconut milk. Add the chia and hemp seeds and whisk well so that the seeds are well distributed through the liquid.
I normally leave it overnight in the fridge, stirring once before I go to bed. If you’re in a hurry, you could stir every hour or so and it should be ready in about 4 hours.

I layered mine with fresh mango, banana, brazil nuts and goji berries for a delicious and energising breakfast.

Health and happiness!

Love,
Raine

Peanut Butter Nana Smoothie

Peanut Butter Banana Smoothie

Yes yes, here I am again talking about breakfast, but I can’t help it! I just love breakfast! I also think it’s hugely important to get a good amount of protein intake in the morning, but if you’re vegetarian (and you don’t like eating chicken for breakfast!) you have to find other ways, and smoothies are amazing for that. This one is a great pre or post workout smoothie or simply good to start you off with heaps of energy. It also means you can whip it up quickly and drink it on your way out if you’re in a rush.

You can use homemade peanut butter by simply putting peanuts in a Vitamix and blending until they make a butter, or you can use store bought but it MUST be a natural, organic butter with no added ingredients, just peanuts. I like Meridian.

Ingredients

250ml almond milk
1 heaped tbsp peanut butter
2 dates
1 banana (sliced and pre-frozen)
1 tsp chia seeds
1 tsp flax seeds

Method

Blend and drink!

Happy, healthy thoughts 🙂
Love,
Lauren

Raw Caramel

photo.PNG

Creamy, gooey, sweet caramel… it must be unhealthy, right? Not this one! And it’s super easy to make too – no more standing over the stove forever to get your caramel just right. This goes wonderfully with No-fry Chocolate and Maca Pancakes, drizzled over slices of apple, as a centre for raw chocolates or just by the spoonful!
I like to make up a batch and keep it in a glass jar for whenever I might need it. Keep refrigerated in very warm weather as it will melt and separate, otherwise in the pantry is fine.

Ingredients

50g organic virgin coconut oil
70g raw almond butter
100g runny raw honey or 85ml organic maple syrup
1/2 tsp vanilla powder
1/4 tsp Himalayan salt

Method

Place all the ingredients into your blender and blend for a couple of minutes. You want everything to melt together into a creamy consistency, and the mixture will change colour as you do this. It’s important to blend for long enough, as opposed to just mixing everything together, to get the right consistency. If it doesn’t look right yet just keep on blending!

Health and happiness.

Love,
Raine

No-fry Chocolate and Maca Pancakes

Choc Maca Pancakes

I can’t think of anything better for Sunday breakfast than a stack of pancakes! And with this recipe they’re completely guilt-free.

This is basically a variant of the Plain Buckwheat Pancakes – I’ve added raw cacao and maca for a delicious malted chocolate flavour. Maca gives you increased energy and is said to help relieve the symptoms of PMS. It has a malted flavour which pairs very well with raw cacao.

Both maca and cacao are aphrodisiacs, so why not start practicing this recipe now for Valentine’s Day?  😉

I find it tedious to stand in front of the stove frying up batches of pancakes, so I decided to try baking them and it worked really well! Of course you also have the added benefit of not having fried them in oil – while coconut oil is the best choice for frying, oils are always healthiest in their raw state.

In this version I used almond flour simply because I have so much (as a by-product of all the almond milk I make) but you could substitute it with buckwheat flour, as in the original recipe.

Ingredients (this makes enough for my husband, my toddler and I – about 12 pancakes)

4 tbsp flax seeds, ground in a coffee grinder (you could also use chia seeds)
150ml water
1 cup almond flour
1 heaped tsp aluminium-free baking powder
1/4 tsp Himalayan salt
3 tbsp raw cacao powder
1 tbsp maca powder
1/2 tsp organic stevia leaf powder (or 1 tbsp organic maple syrup or raw honey)
1 1/2 ripe bananas, mashed with a fork to a puree
1 cup almond milk or other dairy-free milk

Method

Preheat the oven to 180 C.
Combine the ground flax and water to make your flax “eggs.” Refrigerate for 15 minutes while you make the rest of the batter.
Sift together the flour, baking powder, salt, cacao powder, maca powder and stevia. Add the banana and almond milk and use a whisk to combine well. Add the flax “eggs” and whisk again. The flax is quite gluey so make sure you get it mixed in really well.

Line a large baking tray with baking paper. Place a heaped tablespoon of the batter onto the paper and use the spoon to spread it out into a neat circle, about 1 – 2cm thick. Repeat with the rest of the batter.
Bake for about 20 – 30 minutes until they have risen, browned and are cooked through.

I served these with fresh raspberries, blueberries, gooseberries, pomegranate and my Raw Caramel.

Health and happiness!

Love,
Raine

Cacao Maca Overnight Oats

Cacao Almond Butter Maca Overnight oats

Before getting used to this lifestyle of natural, real, non-processed, organic and plant-based food, it’s easy to wonder what one might have for breakfast every day. Westerners are the perfect consumers; we fall to the feet of advertising campaigns and as a result, we believe that breakfast means either toast (gluten), boxed, store-bought cereals (gluten, sugar, salt, dairy) or, if you’re from England, a full English (fried, fatty meats). So when I’m helping people with their diets, the first thing they ask is ‘what am I supposed to have for breakfast?’ Actually, breakfast is one of the easiest meals to be vegan, gluten free, dairy free and sugar free! You just need to get into the swing of it and, well, forget everything you’ve ever been taught! Of course, any change of lifestyle takes some getting used to and it may seem like a lot more work than pouring some cereal out of a box but seriously, give it a go! You’ll realise how easy and delicious our recipes are and how easy it is to start your day right and help your kids do the same. Just check out our breakfast page. If you make small changes, like starting with learning new breakfast recipes, you’ll slowly notice the chemicals in all the foods we buy, and you’ll see how easy it is to make a full change.

I’ve become a massive fan of superfood powders recently and Maca is just amazing. Maca is from Peru and legend has it that it was taken by Incan warriors before going into battle because of its amazing energy-enhancing qualities. It is known in the natural health world as the ‘natural caffeine’ and is an amazing substitute because it doesn’t give you any of the nasty side-effects associated with caffeine but it gives you a huge energy boost, with none of the comedown. It also increases stamina and boosts sex drive. All great reasons to add it to your diet! I get mine from Organic Burst. Just adding a spoonful into your oatmeal, porridge, cereal or smoothie will help your energy levels. I also added cacao and almond butter to this for extra protein. It was so yummy I made it again the next day!

Ingredients (makes one portion but double ingredients to make enough for 2)

Half cup organic rolled oats
1 cup almond milk
1 tsp maca powder
1 tsp raw cacao powder
1 tsp almond butter
1 tsp agave

Method

Simply mix all the ingredients in a bowl, making sure you mix really well so that the powders get fully absorbed. Put it in a jar with a lid or cover bowl with cling film and leave in the fridge overnight. Enjoy the next morning topped with fruit, nuts, seeds – anything you fancy!

Love, light and positive energy for the weekend.
Lauren

Buckwheat Blueberry & Poppy Seed Muffins

Buckwheat Blueberry Muffins

Firstly, we both want to thank you all for the amazing response we’ve had to our blog after only going live yesterday – we appreciate it so much!

I really went out on a limb here today. I wanted to make blueberry muffins for my husband for the weekend as he loves them but I’ve never made buckwheat muffins so I decided to really experiment which is sometimes risky as it can go wrong and you end up throwing away a bunch of good ingredients! Thankfully though, these turned out perfectly!

Buckwheat flour is the perfect substitute for wheat flour because, although you may think buckwheat is a grain, it is in fact a fruit seed so it’s a great replacement for wheat. Buckwheat also helps lower cholesterol and blood pressure, and contains lots of phytonutrients that act as anti-oxidants to fight fight disease. Blueberries are also brilliant anti-oxidants. I also used poppy seeds in these because they are a good source of B-Complex vitamins and I’m trying to increase my B-Complex intake to help my nerve pains, something I still suffer from as a by-product of having long-term arthritis.  Poppy seeds are in fact extracted from the pods of the opium poppy, we just don’t get the same side effects with them (!) They are high in oleic acid (a mono-unsaturated fatty acid) so they help lower cholesterol and they are high in fibre. And guess what? They’re also anti-oxidants!

Ingredients (these are gluten free, dairy free and refined-sugar free)

2 cups buckwheat flour
2 tsp baking powder
1 tsp bicarbonate of soda
Half tsp Himalayan salt
1 ripe banana, mashed
2 eggs (for vegan, substitute with 2 tbsp chia seeds mixed with 5 tbsp water, mixed and left to set for 20 mins)
Quarter cup almond milk
Quarter cup agave or maple
1 tsp vanilla extract
1 cup blueberries
1-2 tbsp poppy seeds, depending on your preference

Method

Preheat the oven to 180.
Sift the flour, baking powder, bicarbonate of soda and salt into a bowl.
In a separate bowl, beat the eggs and add the mashed banana, then add the almond milk, agave and vanilla. Add dry ingredients to wet and mix well. It doesn’t matter if there are a few lumps from the bananas but make sure you mix in all the flour from the bottom of the bowl. Then add the blueberries and poppy seeds.
Place around 9-12 muffin cases in a cupcake oven tray and using a large spoon, spoon in the mixture into each one, filling to nearly the top.
Bake for 20-30 minutes, until golden and fairly moist.
Enjoy warm or cooled.

Have a great weekend everyone!

Love,
Lauren

Gluten-free Zucchini & Buckwheat Pizza

photo-2

My son went through a phase where he wanted to eat nothing but pizza. It was driving me crazy (processed white dough, sugary tomato sauce and processed cheese? Not good enough for my boy!) so I came up with this wheat, gluten, sugar and dairy-free recipe using buckwheat and zucchini (AKA courgette or baby marrow.) I was worried that he wouldn’t like it because buckwheat flour has quite a strong flavour but both he and my husband love it! I have since started using buckwheat flour for many recipes.

For the “cheese” I use Yum Universe’s dairy and soy-free recipe for Vegan Ricotta (why improve on perfection?!) It’s a super easy recipe made from cashew nuts.
My husband prefers dairy cheese so I use organic cheddar from grass-fed cows. Sometimes for my son I’ll use a bit of cheddar and some goat’s cheese, as goat’s milk is much more digestible for humans than cow’s milk. He also enjoys the vegan cheese though.

Ingredients

For the base:

1 cup buckwheat flour
3/4 tsp Oryx Desert Salt
1 tsp baking powder (try to use aluminium-free)
1 tbsp chia seeds, ground in a coffee grinder
1 egg (farm-raised)
2 tbsp olive oil
a bit of water
160g raw zucchini

For the sauce:

Olive oil for frying
1 medium size onion, chopped
3 big cloves of garlic, chopped
1 tin organic tomatoes
1 fresh medjool date
1 or 2 leaves of basil
1/2 tsp Oryx Desert Salt
about 1 1/2 tsp fresh lemon juice

Method

Sift together the flour, salt, baking powder and ground chia.
Break the zucchini into chunks and place into a food processor. Blend into fine crumbs, scraping down the sides if necessary to get all the bits the same size. Alternatively, use a grater.
Beat the egg and olive oil together, along with 1 tbsp water, and then add the zucchini.
Combine the wet and dry ingredients. You may need a little bit more water, but make sure to combine everything well before trying to add more. It will seem too dry and then suddenly it will come together into a dough. This is a very sticky dough, so be careful not to add too much water! Place in the fridge while you make the sauce.

Fry the onion in some olive oil until softened. Add the garlic and fry for a few minutes until it starts to caramelise. Add the tin of tomatoes and the date. Turn down the heat, cover with a lid and simmer for at least 30 minutes. The longer it simmers the more the flavour will develop.
Place the sauce in the blender, along with the salt, basil and lemon. Blend until smooth. Taste for seasoning and adjust if necessary. The trick with a good tomato sauce is getting the correct balance between sweet and sour, so don’t be scared to add a bit more lemon or another date if you think it needs it! This sauce freezes very well so I often make a double batch and freeze half for a day when I am in a rush. You could also use it as a base for a pasta sauce.

Preheat the oven to 200 C.
Oil a large baking tray liberally with olive oil. I find it best to make smaller pizzas so that the base cooks evenly and gets nice and crispy on the edges. So use about 60 – 80g of dough per pizza – one is enough for a child, two for a hungry man.
Place your weighed dough on the tray and sprinkle with buckwheat flour (so your fingers don’t stick.) Gently press the dough out with your finger tips until you have a round of thin dough.
At this point I often finely grate some fresh carrot over the base for added veggies. Then cover the base with your sauce. (If using the vegan cheese it helps to make a little “lip” around the edge of the dough and sauce, to stop the cheese running off.)
Now add your toppings. In this photo I’ve used kalamata olives, sun-dried tomatoes (I use organic, sulphur-free ones which I soak in hot water for a few minutes to soften), onion, basil and avo. Add avo and fresh herbs only after cooking. Other good toppings are caramelised onion, sautéed mushrooms, smoked salmon & rocket… use your imagination!
Now top with your cheese. If using the vegan cheese, simply blend all the ingredients until smooth and then pour directly onto the pizza (rather than heating in a saucepan as the recipe states.) The cheese will thicken as the pizza cooks in the oven. If you have any leftover cheese you can heat it in a saucepan and refrigerate in a jar.

Bake in the oven for about 15 – 20 minutes until crispy around the edges. Yum!

Health & happiness…
Love,
Raine