Chocolate Truffle Hearts

There is nothing inside these chocolates that makes them ‘truffles’ necessarily, it’s just that the mixture is so decadent that when it sets thickly – as it does in the heart-shapes moulds I have because they’re so deep – it honestly tastes and feels like Belgian chocolate truffles melting into your mouth, and yet totally free of refined sugar, dairy, gluten, eggs and preservatives.

They look impressive but I’ll let you into a little secret: they are so easy to make! 4 simple ingredients and that’s it. All you need other than that is a saucepan, a spoon and a silicone heart mould. I used one similar to this.

Fancy treating your loved one? Or just want to keep something rich and decadent nearby for those days when you’re really craving chocolate? These are the ones!

Ingredients

5 tbsp coconut oil
5 tbsp raw cacao powder
2-3 tbsp maple syrup (depending on your preference of sweetness)
2 tbsp cashew butter

Method

Simply put all the chocolate ingredients into a saucepan and melt gently over a low heat, stirring often.

Once it’s melted, use a teaspoon to spoon into the little hearts and put it in the fridge to set for a couple of hours then turn out and store in a container in the fridge.

Devour!

Love & health,
Lauren

Rose Pistachio Chocolate Bark

There is nothing more satisfying than taking a bite out of a chunk of chocolate, and indeed nothing more satisfying at all than knowing that that chocolate is made of only pure, natural, healthy ingredients than not only are not detrimental to your health, but are in fact beneficial to your health.

I usually make my chocolate truffle hearts when I want good old plain chocolate instead of brownies or cakes or cookies, but this time I thought, You know what, just shove the entire mixture into a silicone baking tray and let it set like that instead of putting it into individual moulds.

I love the combination of rose and pistachio, I think it must be something to do with my Moroccanness! so I decided to put a touch of rose water, just enough to taste it faintly on the tongue, but not enough to take away from the exquisiteness of the chocolate, and the pistachios give it a bit of crunch and a touch of savoury to mix in with the sweetness.

As you take a bite out of it, you will honestly feel like that girl in the Magnum adverts, how she looks when she takes a sensuous bite out of the (rubbish-filled) ice cream; it’s heavenly! And so easy to make my son could probably do it…

So I invite you all to join in the raw chocolate revolution! 🙂

Ingredients

5 tbsp coconut oil
5 tbsp raw cacao powder
2-3 tbsp maple syrup (depending on your preference of sweetness)
2 tbsp cashew butter

Optional fillings:
1/2 tsp rose water
Small handful pistachios, crushed roughly
Small handful coconut chips

Method

Simply put all the chocolate ingredients (not the fillings) into a saucepan and melt gently over a low heat, stirring often. Add the rose water if desired.

Once it’s melted, pour it into a baking paper-lined silicone baking tray and sprinkle the fillings into it.

Put it in the fridge to set for a couple of hours then cut or break into chunks.

Devour!

Love & health,
Lauren

Puffed Rice Rocky Road Brownies

I wanted to make some yummy treats for my friend who has just had a baby, because breastfeeding mamas need fuel (and chocolate!) and I decided to try and make a healthier version of Rocky Roads.

Daniel used to make the yummiest Rocky Roads whenever we had people over back in the days when we were young and child-free and still ate refined sugar. He’d melt together every chocolate bar you can imagine, with nuts and marshmallows and freeze it and it was amazing.

But this is more amazing. Really, I’m not just saying that. It’s more amazing because your body is going to thank you after eating them, not hate you. You can give them to your children and not feel bad, and the ingredients are all natural, plant-based and high in protein and nutrients.

Give them a go – you just make and freeze!

Ingredients

1/2 cup cacao butter
1 cup organic rolled oats
1/2 cup pecans
About 18 medjool dates
2 generous tbsp. cashew butter (or any nut butter but cashew is creamier)
5 tbsp. maple syrup
5 tbsp. raw cacao powder
Half cup puffed brown rice (I use Rude Health)
Pinch of Himalayan salt

Method

Melt the cacao butter in a saucepan gently over a low heat.

Put the oats and pecans into a food processor and blitz until they make a meal. Add the dates, nut butter, maple, cacao and melted cacao butter and add a pinch of salt. Blitz to form a sticky mix.

Pour into a bowl and stir in the puffed rice.

Line a square silicone baking tray with baking paper and smooth the mixture into in and smooth down with your hands or a spatula. Make sure it’s in tight.

Leave in the freezer for an hour then cut into cubes and store in the freezer or fridge in a container.

Love & health,
Lauren

Bounty Bars – The Healthy Way

My mum always makes coconut pyramids for Passover which are yummy but of course they use sugar so I thought I’d whip these beauties up as an alternative Passover (and any other time) treat.

They are gluten free, dairy free, sugar free, egg free and vegan.

Ingredients

2 cups desiccated coconut
¼ cup ground almonds
½ cup coconut oil
The cream from the top of a can of full-fat coconut milk
¼ cup maple
1/4 tsp vanilla powder

Chocolate coating:
1/2 cup cacao powder
1/2 cup maple syrup
4 tbsp almond or cashew butter
1/2 cup coconut oil

Method

Melt the coconut oil then mix all the coconut ingredients in a bowl.

Line a baking tray (I use a square silicone one) with cling film, leaving enough hanging over the edges, then press the mixture into it. Remember, they need to be cut into fairly substantial bar sizes once set so keep the thickness and don’t fill the whole tray if it’s too big. Put this in the freezer for half an hour.

Make the chocolate coating while it’s in the freezer by melting all the ingredients in a saucepan over a gentle heat.

Take the coconut mix out the freezer and cut into bars, then dip them into the chocolate and place on a plate and put in the fridge to set for 30-60 minutes.

Store in an airtight container in the fridge.

Love & health,
Lauren

Chocolate & Peanut Butter Drizzled Banana Bread

This is basically exactly the same as my usual banana bread (gluten free, dairy free, refined sugar free and vegan), I just added a bit of peanut butter and chocolate drizzles to the top because, why not!

It sank a bit in the middle which is really annoying when you make something so pretty, but I think it was still worth a picture 🙂

Ingredients

3 large very ripe bananas, mashed (if they are small, use 4)
1 whole banana for the middle (optional)
1/3 cup maple syrup
1 heaped tbsp. coconut oil, melted
1 tbsp flax seeds
4 tbsp filtered water
1 cup buckwheat flour
1.5 tsp baking powder
½ tsp bicarbonate of soda
¼ tsp ground cinnamon

Chocolate sauce to coat the banana in (optional):
2 tbsp cacao powder
2 tbsp coconut oil
1 tbsp maple syrup
1 tbsp tsp cashew butter

Drizzle topping:
1 heaped tbsp smooth peanut butter
Leftover chocolate sauce from the banana coating

Method

(Quick note: if you want this to  be quick and simple, just leave out the optional chocolate-covered banana in the middle, the cake will be just as nice!)

Preheat the oven to 180° and line a loaf tin with baking paper and grease with coconut oil.

Make the chocolate sauce by melting all the sauce ingredients on a gentle heat in a saucepan. Coat the whole banana in the chocolate sauce and leave in the fridge to set. Save whatever is leftover of the chocolate in the saucepan for later.

Mix the flax seeds in a small bowl with the water and set aside so it can set. (this is a flax ‘egg’ and used instead of eggs.)

Mash the other 3 bananas in a large bowl and add the coconut oil and maple, then add the flax mix and mix well.

Now add the flour, baking powder, baking soda and cinnamon.

Move just under half the batter into the loaf tin then put the chocolate-covered banana on top. Now add the rest of the mix on top of the banana.

Put it in the oven for around 25–30 minutes, or until a fork comes out clean. My oven tends to cook things much quicker than most so it’s been a bit of a learning curve, your oven may need more time.

Leave on a wire rack to cool then turn out of the loaf tin onto a plate.

Once cool, put the peanut butter on a plate and even out so it’s quite thin on the plate, then put it in the microwave for about 2 minutes, or until it starts cracking, then, once cool enough for you to handle with your fingers, sprinkle it over the top of the cake.

Finish by drizzling the remaining chocolate sauce in the saucepan over the top.

Delicious served with peanut or almond butter!

Enjoy!

Love and health,
Lauren

Easy Blueberry Breakfast Muffins

muffin-1

Looking for on-the-go snacks for those mornings when you wake up late and don’t want to feel guilty about sending the kids off without a good breakfast ? This is what you need! These muffins are a great way to start the morning as they are gluten free, wheat free, grain free, refined sugar free, dairy free and egg free. They are full of yummy plant-based goodness and slow-releasing energy, and they’re also great for baby-led weaning. Oh, and they’re super easy to make!

muffin-2

Ingredients: (makes around 7 muffins – if you need more, just double the mixture)

3 small ripe bananas (2 if large)
¼ cup maple syrup
3 tbsp coco palm sugar
2 generous tbsp. peanut butter
1 tsp vanilla extract
¼ cup almond milk
1 tbsp coconut oil
1 cup buckwheat flour
1 tsp baking powder
½ tsp bicarbonate of soda
Pinch Himalayan salt
Big handful of blueberries

muffin-3

Method

Preheat the oven to 180 degrees and line a muffin tin with about 7/8 muffin cases.

Mix all the wet ingredients in a bowl.

In a separate bowl, mix the flour, baking powder, bicarb and salt.

Add the dry ingredients to the wet and mix well.

Once mixed, add the blueberries and mix, distributing them evently.

Spoon mixture into the prepared muffin cases, about 2/3 of the way up.

Bake in the oven for around 18 minutes or until the tops are golden and a fork comes out clean.

Love & health,
Lauren

Vegan Peanut Butter Breakfast Cookies

img_6818

Crunchy, yet slightly gooey peanut butter cookies. What could be better?

Braxton has decided he’s on hunger strike at the moment so I’m trying to find just anything that he’ll eat and I made these in the hope that he’d like them and he did, he was very happy. Now just to get him to eat broccoli…

We are also going away soon and I wanted to test out new things that I can take as snacks on the plane. Muffins always go down well but I thought that some harder cookies would also make a nice (and less messy) snack. Trying to figure out 24 hours worth of food and snacks for a 14 month old is no easy feat!

Anyway I kind of just threw the ingredients for these together but they turned out so delicious, I’m really happy with them.

Of course, as usual, gluten free, grain free, dairy free, refined-sugar free and vegan.

Ingredients

125g buckwheat flour
1 tsp baking powder
½ tsp bicarbonate of soda
Pinch Himalayan salt
45g coconut palm sugar
60ml maple syrup
5 tbsp almond milk
1 tsp vanilla bean paste
4 tbsp coconut oil and extra for greasing
5 tbsp peanut butter

Method

Preheat the oven to 180 degrees and line 2 baking trays with baking paper and grease with coconut oil.

In a bowl, mix together the buckwheat flour, baking powder, bicarb and salt.

In a saucepan over a gentle heat, add the rest of the ingredients except the peanut butter, and heat gently until melted.

Once melted, add the peanut butter and stir until it’s softer.

Once that mixture is smooth, add it to the dry mixture. You might have to get in there with your hands as it could get a little crumbly. If it is too crumbly and won’t stick, add more coconut oil, maple and almond milk, but not too much.

Take a small amount in your hand and roll into a ball shape, then flatten it on the prepared baking tray. Repeat until you finish the mixture.

Bake for 7 minutes. They should look golden around the edge but still white-ish in the middle as they will continue to harden when they come out the oven.

Leave to cool before removing from the trays and keep in an airtight container in a cool place.

Love & health,
Lauren

Vegan Pumpkin Donuts

donuts-edited

Yup, so this actually happened in my kitchen today!! I’d been seeing a lot of pictures of donuts around and my friend Deepa at GirlBoyFoodBaby made some healthy donuts also, so I decided to give it a go.

I wanted to make them using pumpkin (had a bee in my bonnet) so that they were autumnal (best word) and obviously now it’s made from a vegetable it’s basically like eating a salad so I can have as many as I want, right??

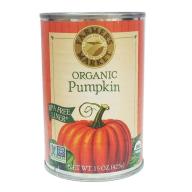
I found an organic pumpkin puree at Ocado which worked great. I could have pureed my own of course but these are so time consuming that I thought I’d buy the tinned one seeing as it was organic! This is the pumpkin puree I used…

344191011_0_640x640

Speaking of time consumption, this deserves a warning… the donuts themselves do not take long to make at all. About 10 minutes prep and 7 minutes in the oven, but the toppings take a while. That is if you want to do different kinds like I did. If you just do one kind, you can whip it up while the donuts are in the oven and cooling and it won’t take too long at all. As usual, it’s really just the clearing up that takes up most of the time with baking… Surely I deserve to have someone to wash my dishes for me by now right?? 🙂

Anyway time-consuming toppings aside, does it really matter? I mean look how awesome they look! And they taste awesome too. Of course they taste nothing like a Krispy Kreme, but then again, I wouldn’t want it to. I want Braxton to grow up appreciating natural sweetness and natural flavours, not artificial rubbish filled with sugar and preservatives. Speaking of which, I used a lot of Biona products for these. Including their coconut palm sugar and coconut oil. I love how natural and organic their products are. Great for our health and for the environment.

You’ll need a donut tin for this, I got mine on Amazon and it looks like this…

61xu9zrdl1l-_sl1000_

We took these with to our sister-in-law for dinner and everyone seemed to really enjoy them. We’ve saved one over for Braxton for a snack later (well, he’ll have a quarter) I hope you enjoy them xx

Ingredients (ingredients for toppings below at bottom of method)

1 flax egg: 1 tbsp ground flax seeds mixed with 1.5 tbsp water
1 heaped cup buckwheat flour
1 tsp baking powder
1 tsp bicarbonate of soda
3/4 tsp ground cinnamon
3/4 tsp ground nutmeg
Pinch Himalayan salt
1/3 cup Biona coconut palm sugar
1/2 cup pumpkin puree
1/4 cup almond milk
2 tbsp maple syrup
1 tbsp coconut oil, melted
1 tsp vanilla extract

Method

Preheat the oven to 180 degrees and lightly grease the holes of the donut tin with coconut oil.

First, make the flax ‘egg’ by mixing the flax seeds with the water in a very small bowl and set aside.

Now mix all the dry ingredients in a bowl: buckwheat, baking powder, bicarb, cinnamon, nutmeg and salt.

In another bowl mix the coconut palm sugar, pumpkin puree, almond milk, maple, coconut oil, vanilla and then add the flax ‘egg’. Whisk with a fork or balloon whisk until smooth.

Add the wet ingredients to the dry and mix with a wooden spoon or silicone spatula until totally incorporated.

Put the mixture into the prepared holes in the tin using your hands and smoothing them out on the top.

Place in oven and bake for about 7 minutes or until a fork comes out clean. They should still be moist.

Turn out onto a wire rack and leave to cool fully before adding the toppings.

Topping choices:
Cinnamon vanilla glaze: In a small bowl mix 3 tbsp Natvia icing sugar, 1 tbsp warm water, quarter tsp vanilla extract. Spoon unevenly over the top of the donuts, then sprinkle with cinnamon.
Cashew cream: In a small bowl mix 2 tbsp cashew butter, 1 tsp melted coconut oil, half tsp vanilla, half tsp maple syrup. Spoon all over the tops and sides of donut and top with crushed cashews.
Chocolate: 1 tbsp cacao butter, 1 tbsp coconut oil, 1 tbsp cacao powder, 1 tsp maple. Heat gently in a saucepan and once ready, add to the top of the donuts. You can cover it then top with pistachios or almonds or you could drizzle it with a spoon.

Hope you enjoy these as much as we did!

Love & health,
Lauren

Golden Linseed Oat Cookies – Full of Omega-3 and Great for Baby Led Weaning

img_6384

As you all know by now, I usually make sure to make a batch of something sweet but healthy once a week (ish!) so that I don’t have to give Braxton anything processed or filled with sugar. I don’t give him sweet things every day (apart from fruit), but I do like to give him things like this every few days now he’s nearly 1. It keeps him quiet for 5 minutes, that’s for sure! 🙂 But the main point is that I like to make sure I fill any snacks I make with superfoods.

Making cookies like these is a great way to be able to add things like linseeds, which are a great vegetarian source of the Omega 3 essential fatty acid, Alpha-Linolenic Acid (ALA). Our bodies can’t make ALA, so it is ‘essential’ that we get them from our diet. These essential fatty acids also have anti-inflammatory properties, so aside from making sure he gets essential fatty acids in his diet, I’m also giving him anti-inflammatory properties which, in our situation, is imperative.

Suffice to say these were very well received! Soft on the inside, slightly crisp on the outside and easy for Brax to chew. Sweet but not too sweet and of course, free of gluten, wheat, dairy, refined sugar or eggs.

Ingredients (makes 12 cookies)

1 cup ground almonds
1 ½ cups organic rolled oats
½ tsp baking powder
½ tsp bicarbonate of soda
Pinch Himalayan salt
5 tbsp coconut oil
1/3 cup maple syrup
4 tbsp almond butter
¼ cup almond milk
1 tbsp golden linseeds

Method

Preheat the oven to 180c and line 2 baking trays with baking paper and grease with coconut oil.

Mix all the dry ingredients, except for the linseeds, in a bowl.

Add all the wet ingredients to the blender and blend until combined.

Pour the wet mixture into the dry ingredients and mix well. Add the linseeds and mix.

Form into balls with your hands and press down on them on the prepared baking trays and bake for 10 minutes.

Put the baking sheets with the cookies on them on a wire rack or on top of some towels on the work surface (the surface they cool on shouldn’t be cold) to cool away from the heat of the baking trays so they don’t crisp up too much. Once cool put in an airtight container.

Love & health,
Lauren

Vegan Lemon & Poppy Seed Muffins

Lemon Poppy Seed Muffins

I love muffins and cupcakes, but I try to stay away from the ones packed with refined sugar, gluten and dairy these days. My favourite was always lemon and poppy seed so I thought I’d try to make my own today. I’m loving using my Natvia natural sugar substitute and wanted to try it in muffins and they turned out beautifully – a real indulgent afternoon snack with a cup of herbal tea!

Ingredients

2 flax eggs (mix 2 tbsp ground flax seed with 5 tbsp water and leave aside in a bowl)
¼ cup vegan margarine / non-dairy butter/spread (room temperature, soft)
¼ cup Natvia
1 tsp vanilla extract
4 tbsp lemon juice
Zest of 1 lemon
1 cup buckwheat flour
1 tsp baking powder
3 tbsp almond milk
2 tbsp poppy seeds
2 tbsp maple syrup (optional, omit for diabetics or low GI)

Frosting:
2 tbsp non-dairy butter / marge at room temperature
2 tbsp Natvia
2 tbsp lemon juice

Method

Preheat the oven to 180 degrees and line a cupcake / muffin baking tin with cupcake cases.

Prepare your flax eggs by mixing the flax seeds and water in a bowl and setting aside.

Put the margarine in a bowl and whip with a fork or a handheld whip.

Add the Natvia and mix, then add the flax eggs and mix until totally combined.

Add the vanilla, lemon juice and lemon zest and combine.

Now add the buckwheat flour, slowly, and mix as you go until you have added it all, then add the baking powder, then the almond milk and poppy seeds and mix until incorporated.

Spoon the mixture between the cupcake cases and bake for around 12 minutes, or until a fork comes out clean but they are still fairly moist.

Love & health,
Lauren