Basil Pesto

IMG_0007

This is my dairy-free version of pesto (traditionally you would add parmesan,) and using a combination of cashews and sunflower seeds makes it more economical.  If you have pine nuts, feel free to use them! If you have a nut allergy you could replace the nuts with more seeds.
This will keep in a jar in the fridge for about a week, or you could make a big batch when you have lots of basil and freeze it in smaller portions. I often freeze sauces in an ice tray, and then put the cubes into a freezer bag. That way you can just defrost a few cubes at a time, instead of the whole lot.

I’ve given alternatives in case you feel like a change, or if you don’t have the correct ingredients on hand.

Ingredients

80g fresh basil leaves (or replace 40g with fresh spinach)
1/2 cup raw cashews (or macadamias)
2 tbsp raw sunflower seeds (or pumpkin seeds)
2 cloves garlic
1/2 tsp Himalayan salt
1 tbsp nutritional yeast
juice of 1 lemon, or to taste
1/2 cup extra virgin olive oil

Method

I like my pesto chunky so I make it in a food processor, but you could do it in a blender if you prefer it smoother. Simply throw in all the ingredients and pulse until you have the desired consistency. As with all our dips & sauces, taste for seasoning and adjust if necessary to the way you like it!
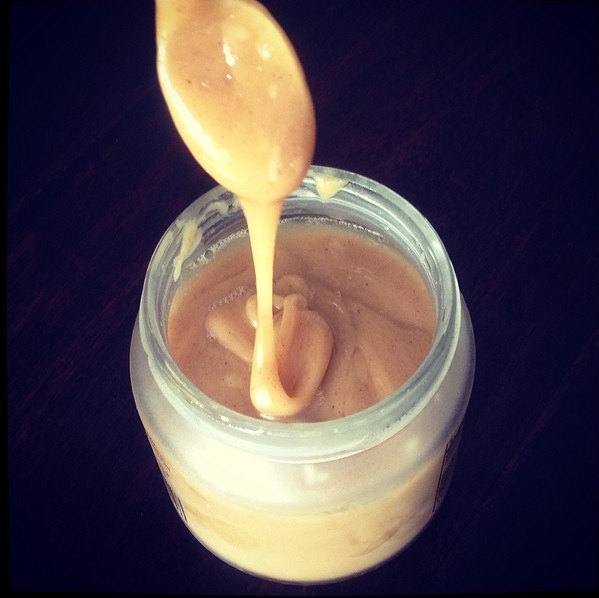
I find that this makes the perfect consistency for using as a dip or spread, but if you want to use it as a sauce for gnocchi for example, add a few drops of water just to loosen it up a bit.

Health and happiness!

Love,
Raine

Chai Coconut Milk Chia Pudding

chai chia pudding2

That might sound like a mouthful, and it is… a mouthful of deliciousness and health! “Chia” is the ancient Mayan word for “strength” and these little seeds were prized for their ability to provide long-lasting energy. They provide high nutrition for low calories (almost all of their carbohydrates are in the form of fibre) so this is a great food if you’re trying to lose weight. They are high in protein, fibre, Omega 3 fatty acids, calcium, magnesium, phosphorus and antioxidants.

You can sprinkle chia seeds over your breakfast or add them to smoothies, but my favourite way to eat them is by making chia pudding. When you soak these little nutritional powerhouses in liquid, they swell and absorb the liquid. The result is a creamy and delicious pudding. Great for breakfast or dessert… and who doesn’t love dessert for breakfast?!

I prefer to grind my spices fresh in a coffee grinder as the flavour is much more intense, but you could use pre-ground spices if you don’t have whole spices or a coffee grinder.


Ingredients

1 stick of cinnamon (3/4 tsp ground)
1 star anise (1/4 tsp ground)
the seeds of 8 green cardamom pods (1/2 tsp ground)
about 1/5 of a whole nutmeg (1/4 tsp ground)
1/4 tsp Himalayan salt
1 – 2 tbsp raw honey or organic maple syrup
2 cups coconut milk (I make my own but you can use an organic tinned one which contains only coconut and water)
90ml chia seeds
60ml hemp seeds

Method

Firstly, grind the spices until you have a fine powder. Place them in a bowl with the honey and salt and a few drops of the coconut milk. Use a whisk to dissolve the honey, and then add the rest of the coconut milk. Add the chia and hemp seeds and whisk well so that the seeds are well distributed through the liquid.
I normally leave it overnight in the fridge, stirring once before I go to bed. If you’re in a hurry, you could stir every hour or so and it should be ready in about 4 hours.

I layered mine with fresh mango, banana, brazil nuts and goji berries for a delicious and energising breakfast.

Health and happiness!

Love,
Raine

Raine’s Favourite Green Juice

green juice
Drinking green juice on an empty stomach when you wake up gives you a boost of nutrients that will give you energy for the day, heal your cells and fight off free-radicals (the nasty stuff that causes cancer.) I drink one just about every morning, and on the days that I don’t have a juice I can really feel the difference.
If you’ve never had a green or any vegetable juice before it may take you some time to get used to it, but I promise it will be worth it. If my husband can get used to it (and now even love it) then anyone can! On a hot summer morning it’s super refreshing, and in the winter months it gives your body everything it needs to fight off colds and flu.

The general rule is that you should juice your veg but eat your fruit (as is or blended in a smoothie.) This is because fruit is high in natural sugars so you need the fibre in the fruit to prevent a blood-sugar spike.
However, if you’re new to juicing, I recommend that you start off with a little bit less of the really strong tasting stuff (spinach, kale, broccoli etc) and use more of the easy-drinking vegetables (carrot, beetroot, celery, cucumber) along with fruit (apple, pineapple, grapes etc.) As you get used to it you can increase the vegetables and decrease the fruit. After all, what’s the point of making one really strong juice and then never having another?!
Over time you’ll start to enjoy the taste of the vegetables and will only need half an apple, or eventually none at all.

I make juice with whatever fresh vegetables, fruit, herbs and spices (fresh ginger or turmeric, sometimes even chilli!) I have available. I like to mix it up. This is one of my favourite combinations – I love the liquorice flavour of the fennel and it goes really well with the lime and lemongrass.

Ingredients (serves 2)

A big handful of kale or spinach
6 baby fennel or 1 large bulb
3/4 of a large English cucumber
2 limes
a knob of ginger (not too much if you’re not used to it)
a knob of turmeric (optional – great anti-inflammatory properties)
a stick of lemongrass
a handful of white grapes, or 1 – 2 apples
a few leaves of mint

Method

I highly recommend a slow, masticating juicer over a centrifugal juicer, as it preserves nutrients and gets maximum juice out of your ingredients, especially when it comes to leafy greens. (But juice from a centrifugal juicer is better than no juice at all!)
The money you spend on a quality slow juicer, such as an Oscar or Hurom, will be well worth it and will save you in doctor’s bills in the future.

When juicing in a slow juicer, always do your leafy greens first and don’t try to shove too much in at once – give the machine a chance to do its thing.

You can also check out Lauren’s Favourite Green Juice.

Health and happiness!

Love,
Raine

Raw Caramel

photo.PNG

Creamy, gooey, sweet caramel… it must be unhealthy, right? Not this one! And it’s super easy to make too – no more standing over the stove forever to get your caramel just right. This goes wonderfully with No-fry Chocolate and Maca Pancakes, drizzled over slices of apple, as a centre for raw chocolates or just by the spoonful!
I like to make up a batch and keep it in a glass jar for whenever I might need it. Keep refrigerated in very warm weather as it will melt and separate, otherwise in the pantry is fine.

Ingredients

50g organic virgin coconut oil
70g raw almond butter
100g runny raw honey or 85ml organic maple syrup
1/2 tsp vanilla powder
1/4 tsp Himalayan salt

Method

Place all the ingredients into your blender and blend for a couple of minutes. You want everything to melt together into a creamy consistency, and the mixture will change colour as you do this. It’s important to blend for long enough, as opposed to just mixing everything together, to get the right consistency. If it doesn’t look right yet just keep on blending!

Health and happiness.

Love,
Raine

No-fry Chocolate and Maca Pancakes

Choc Maca Pancakes

I can’t think of anything better for Sunday breakfast than a stack of pancakes! And with this recipe they’re completely guilt-free.

This is basically a variant of the Plain Buckwheat Pancakes – I’ve added raw cacao and maca for a delicious malted chocolate flavour. Maca gives you increased energy and is said to help relieve the symptoms of PMS. It has a malted flavour which pairs very well with raw cacao.

Both maca and cacao are aphrodisiacs, so why not start practicing this recipe now for Valentine’s Day?  😉

I find it tedious to stand in front of the stove frying up batches of pancakes, so I decided to try baking them and it worked really well! Of course you also have the added benefit of not having fried them in oil – while coconut oil is the best choice for frying, oils are always healthiest in their raw state.

In this version I used almond flour simply because I have so much (as a by-product of all the almond milk I make) but you could substitute it with buckwheat flour, as in the original recipe.

Ingredients (this makes enough for my husband, my toddler and I – about 12 pancakes)

4 tbsp flax seeds, ground in a coffee grinder (you could also use chia seeds)
150ml water
1 cup almond flour
1 heaped tsp aluminium-free baking powder
1/4 tsp Himalayan salt
3 tbsp raw cacao powder
1 tbsp maca powder
1/2 tsp organic stevia leaf powder (or 1 tbsp organic maple syrup or raw honey)
1 1/2 ripe bananas, mashed with a fork to a puree
1 cup almond milk or other dairy-free milk

Method

Preheat the oven to 180 C.
Combine the ground flax and water to make your flax “eggs.” Refrigerate for 15 minutes while you make the rest of the batter.
Sift together the flour, baking powder, salt, cacao powder, maca powder and stevia. Add the banana and almond milk and use a whisk to combine well. Add the flax “eggs” and whisk again. The flax is quite gluey so make sure you get it mixed in really well.

Line a large baking tray with baking paper. Place a heaped tablespoon of the batter onto the paper and use the spoon to spread it out into a neat circle, about 1 – 2cm thick. Repeat with the rest of the batter.
Bake for about 20 – 30 minutes until they have risen, browned and are cooked through.

I served these with fresh raspberries, blueberries, gooseberries, pomegranate and my Raw Caramel.

Health and happiness!

Love,
Raine