Cauliflower & Tahini Soup

Cauliflower & Tahina Soup

I love cauliflower, especially as a purée, because of the beautiful smooth texture it blends into. This soup makes use of that, and the addition of tahini makes it even creamier!

Cauliflower contains sulforaphane, which has been shown to kill cancer stem cells, thereby slowing tumor growth. Researchers believe that eliminating cancer stem cells may be the answer to fighting cancer. It is also packed full of anti-oxidants and phytonutrients, is good for your heart and your brain, and has anti-inflammatory properties.

Sesame seeds (the main ingredient of tahini) are high in calcium, magnesium, phosphorus and iron. Need any more reasons to make this soup tonight? It’s simple to make and takes no time at all!

Ingredients (serves 4)

3 tbsp extra virgin olive oil
2 large onions, sliced
6 big cloves of garlic
1 tsp cumin seeds
1 whole star anise
a head of cauliflower (about 500g) cut into florets
one potato (about 200g) peeled and cut up
1 litre water
1 tbsp organic vegetable stock paste or powder
3 bay leaves
the juice of half a lemon
1/2 tsp himalayan salt
1/8 tsp white pepper
1/3 cup organic tahini
pomegranate concentrate (optional)

Method

Fry the onion in the olive oil until it caramelizes. The more colour you get on the onions, the more flavour you’ll be putting into the soup. You want them to look something like this:

IMG_0130

The trick is to keep it on a medium heat and stir every now and then. If you feel that they may start to burn, add a few drops of water and continue. You could brown them even more than I’ve done here, I was just in a rush to make supper!

Add the garlic, cumin and star anise. Fry for a few more minutes. Add the cauliflower, potato, water, stock and bay leaves. Simmer until the cauliflower and potato are tender. The smaller (and more evenly-sized) your pieces of cauliflower and potato, the faster they will cook.

Remove the bay leaves and star anise, then pour everything into your blender. Add the rest of the ingredients and blend until completely, 100% smooth. The measurements I’ve given for lemon, salt and pepper are just a guideline – use your taste!

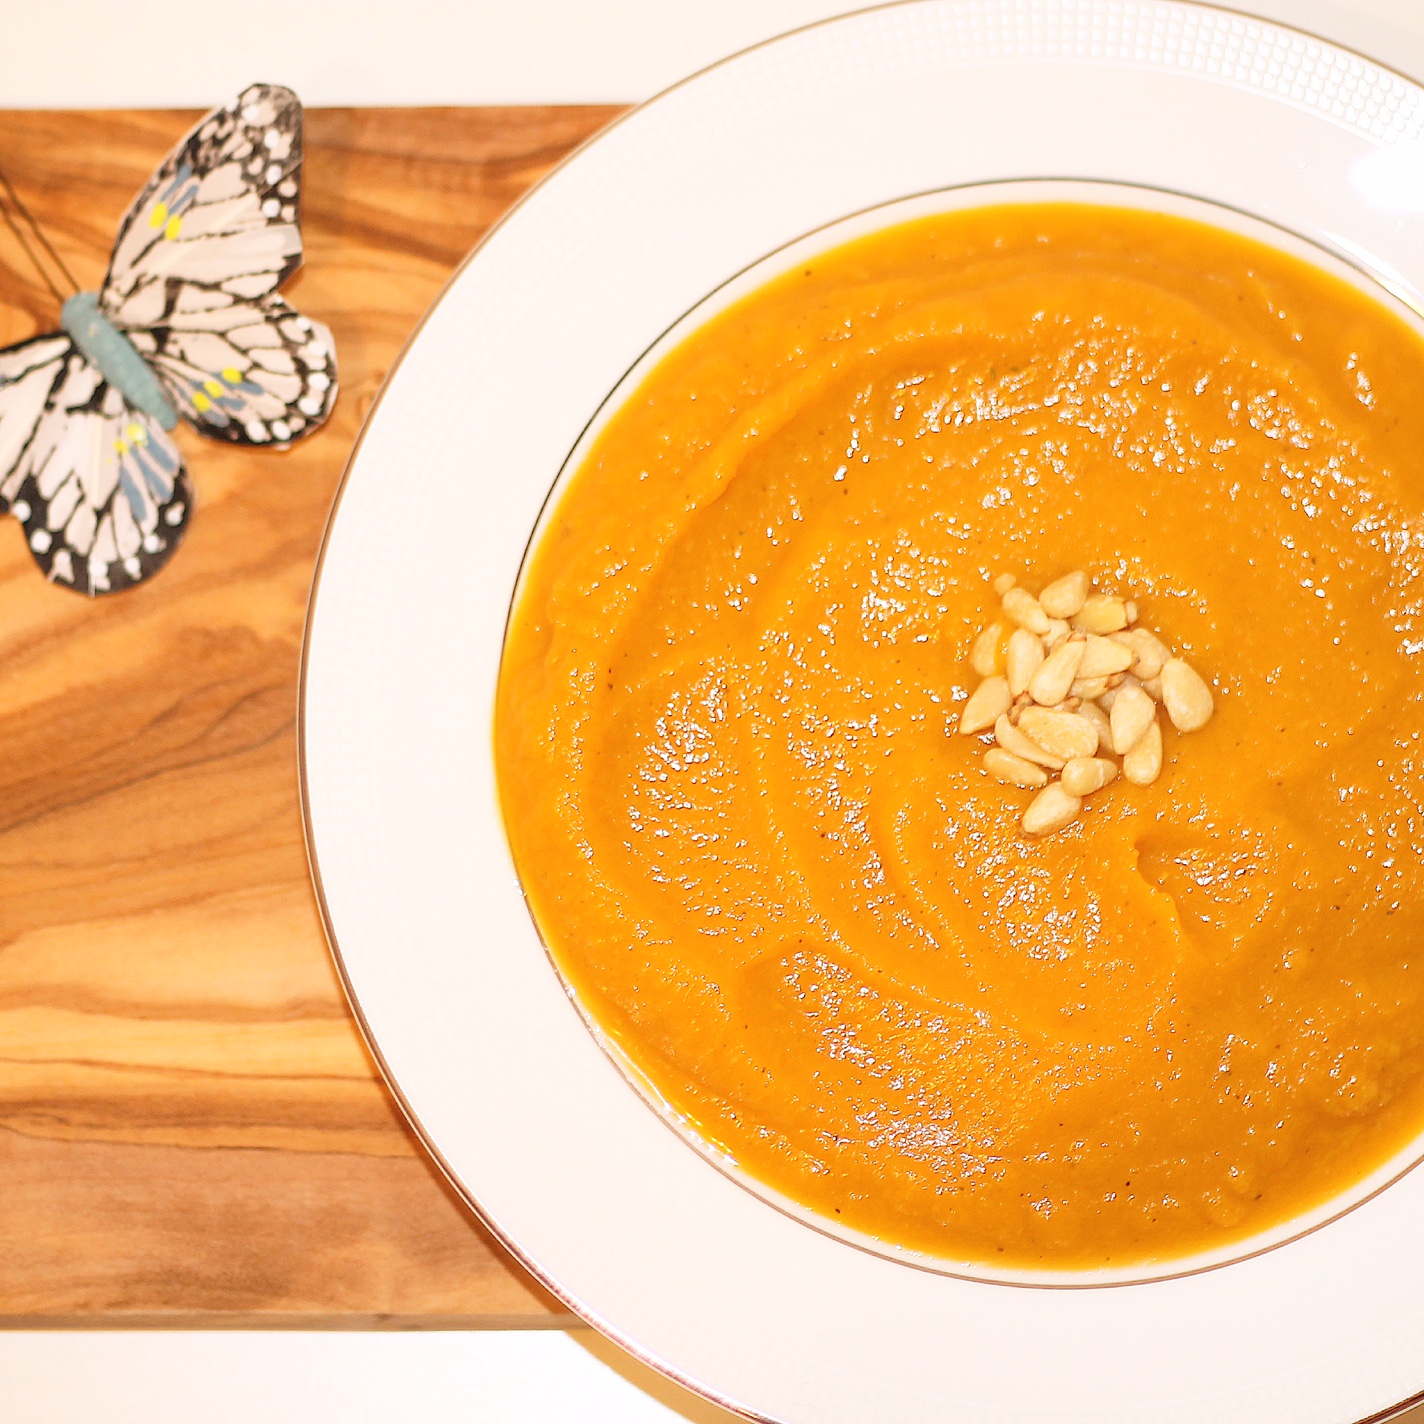
I’ve served it with a drizzle of pomegranate concentrate – the sweet tartness balances the soup beautifully.

Health & happiness!

Love,
Raine

Raw Vegan Super Berry ‘Cheesecake’

Raw Cheesecake 1

Need we say more?? We both have a real sweet tooth so come 3/4 in the afternoon, we are wanting something with our herbal tea and this is a perfect afternoon treat… We had made a massive batch of cashew yoghurt and had loads leftover so we thought, what can we use it for? And we came up with this. It’s easy to make, but takes some time because you have to do each layer separately.

We love using acai berries for their anti-oxidant powers so we wanted to make a super-berry topping, next time we’ll do chocolate!

Ingredients

Base:
1 cup almonds
Quarter cup pecans
6 dates
1 tbsp coconut oil, melted
Pinch of Himalayan salt

Middle layer – Cashew cream:
1 cup cashews
1 and quarter cups purified water
2 dates
2 tsp organic natural maple
1 tsp vanilla essence

Top layer:
1 frozen banana
Quarter cup of freshly frozen blueberries (blueberries bought pre-frozen have too much water)
The cream from the top of a can of coconut milk
4 acai berry capsules (we used Organic Burst)
1 tsp organic natural maple syrup

Method

Before you start any of this, you must soak your nuts. Soak almonds and pecans for the base in one bowl, and the cashews for the middle in two separate bowls and leave to soak in purified water for AT LEAST 4 hours. Soak overnight if you can. Do not omit this step.

Once the nuts are ready, drain and rinse the almonds and pecans and put them in the blender with the dates, coconut oil and salt. Once combined, flatten this base layer into the base of a smallish springform cake tin and put it in the freezer while you make the middle layer.

For the middle layer, rinse your cashews then put them in the blender with the water and blend for around 7-10 minutes. You need it to go super smooth and creamy. If you have a high-speed blender like a Vitamix, the mixture will heat up like a soup, don’t worry. After around 4 minutes of blending, add the rest of the ingredients and proceed to blend until completely smooth like a yoghurt. Leave it by the window until it cools then pour it over the base layer and put back in freezer. Leave it in the freezer for an hour

Now make your top layer by simply blending all the ingredients. Once the middle layer is firm enough, pour top layer on top and put back in freezer for the last time for around 45 minutes or until firm.

When you take it out, you may need to wait 15 minutes until it is ready to push out of the cake tin and you could use a sharp, thin knife to cut around the edges to help you.

Leave it to melt a little bit and serve straight away or put in fridge and serve from fridge once it’s a little softer.

Raw Cheesecake 2

We hope you love it as much as we do!

Love,
Lauren & Raine

Raw ‘Bounty’ Bars

raw bounty bites

Well these certainly went down a treat in my house! Who doesn’t like Bounty?? It is one of my favourite chocolates and just like with most things, here at Two Kitchens, we like to create healthy variations for our favourite snacks.

These are completely free of gluten, refined-sugar, dairy and chemicals, and require surprisingly few ingredients!

Ingredients

Coconut filling:
Half cup desiccated coconut (unsweetened, organic)
A quarter cup coconut oil, melted over the hob
5 tbsp agave nectar
1 tsp vanilla essence

Chocolate layer:
4 tbsp cacao butter
1 tsp coconut oil
4 tbsp raw cacao powder
2 tbsp organic maple

Method

Mix the coconut filling ingredients well in a bowl. Get an empty ice cube tray and portion the mixture into the little cube holes and push them in so they gain the right shape. Once you’ve finished the mixture, put this in the freezer for twenty minutes.

Meantime, melt the cacao butter and coconut oil in a small saucepan over a medium heat. Once melted, add the cacao. Once combined, while stirring, remove from the heat and add the maple. It will bubble a bit so leave it off the heat while you mix it then when it calms down, put it back on the hob on a low heat for a minute, until fully combined.

Once the coconut bites are ready, remove from the freezer and from the ice tray and put them on a plate. Coat each one individually in the chocolate, then, leaving them to sit on a plate put back in the freezer for 10 minutes, remove, and repeat this step as the first chocolate layer will be absorbed by the coconut oil but the second layer will go on nicely. Leave for about half an hour, remove, and store in an airtight container in either the fridge or freezer for up to two weeks.

Happy bounty hunting!
Love,
Lauren

Simple Chia Pudding with Berry Compote

Chia pudding

I keep trying to spread a message about breakfast… it really isn’t very hard to make nutritious, delicious, simple breakfasts for the whole family in order to be able to bin the horrible processed cereals. It can be very daunting when embarking upon this lifestyle, we think it’s going to be really hard but making this chia pudding was no harder than making a bowl of cereal or porridge. If you just change one thing at a time, make breakfast your first change, the kids will love these ideas – just check out all our other breakfast options!

It isn’t baby led weaning-friendly but if you’re happy with spoon feeding your baby / toddler, this really makes such a nutritious breakfast.

“Chia” is the ancient Mayan word for “strength” and these little seeds were prized for their ability to provide long-lasting energy. They provide high nutrition for low calories (almost all of their carbohydrates are in the form of fibre) so this is a great food if you’re trying to lose weight. They are high in protein, fibre, Omega 3 fatty acids, calcium, magnesium, phosphorus and antioxidants.

You can sprinkle chia seeds over your breakfast or add them to smoothies, but this is just another great way to eat them. When you soak these little nutritional powerhouses in liquid, they swell and absorb the liquid. The result is a creamy and delicious pudding. Great for breakfast or dessert… and who doesn’t love dessert for breakfast?!

Ingredients (one portion)

2-3 tbsp chia seeds
1 small cup almond milk
1 tsp organic natural maple syrup
1 tsp vanilla essence

For the compote (completely optional as you can top the pudding with whatever you like):
4 strawberries
4 raspberries
6 blueberries

Method

The night before you want to eat this, simply mix the chia seeds in a bowl or glass or jar with the almond milk, maple and vanilla (both the latter are optional also, but nice for a bit of sweetness and flavour), cover and leave in the fridge overnight. When you first mix it, it will look like it isn’t absorbing but in the morning you’ll see how the seeds have swelled to look almost like passion fruit seeds (don’t worry, they’re much softer than passion fruit seeds).

Add the fruit to the blender and blend until smooth. Top the pudding with this and add any nuts, seeds or fruit you fancy!

You can also try Raine’s Chai Chia Pudding (a mouthful yes but the pudding works so well with the chai spice flavours)

Health and Happiness,
Love,
Lauren

Butternut Squash & Ginger Soup

Butternut Ginger Soup

Another warming soup for another cold London day. You can probably tell by all my recipes how much I love butternut squash! Butternut squash have a lower glycemic index than potatoes and are high in fibre so great for the metabolism. They’re packed with Vitamin A and potassium, are low in calories (low GI) and high in Vitamin B Complex which I need lots of for my nerve problems caused by long-term arthritis. They are also high in polyphenols (like acai berries and blueberries) which are great anti-oxidants. An all round brilliant vegetable! I added ginger, firstly because I like to take advantage of the detox affects of ginger but also because it gives it a great kick. The two flavours really go nicely together – my mum taught me that! I of course added turmeric, as I do to everything that is yellow, for some anti-inflammatory action.

Ingredients

1 butternut squash
1 large sweet potato
1 onion
1 cup vegetable stock
1 cup almond or coconut milk
1 tsp freshly shaved ginger
1 tsp turmeric
Salt & pepper to taste
Half tsp coconut oil
Handful of pine nuts (optional)

Method

Peel and chop your vegetables. When that’s done, heat the oil in a large saucepan and when hot, add the onion and cook for one minute. Then add the butternut and sweet potato and coat in the oil, 30 seconds should be enough.

Add the stock and almond milk, along with the rest of the ingredients and keep at a high temperature until it starts bubbling then turn down to low, put on the lid and let it simmer for an hour.

Once all veggies are soft, use a handheld blender to blend (or put it in a food processor if you don’t have a handheld) and blend until smooth. Add salt & pepper to taste. Decorate with pine nuts, a great accompaniment for this soup!

Enjoy!
Love,
Lauren

Creamy Cashew Yoghurt

Cashew Yoghurt

I love yoghurt and I think it’s one of the things I found I missed most when cutting out dairy. But don’t fret! We can make our own dairy-free version of course! And I used cashews here. Mainly because cashews go really nice and creamy and are also quite sweet so they make a great yoghurt. The magnesium content in cashews also helps keep our bones strong and are packed with flavanols which starve tumours and stop cancer cells from spreading, which is essential in this day and age with all the cancers around.

I added 2 probiotic capsules to this also, firstly to help keep my gut strong (read about that here) but also to help build yoghurt cultures in the yoghurt, so it’s not just a cashew cream.

In order for nuts to survive, nuts contain inherent toxic inhibitors that protect the plant from germination until the ideal conditions are present (nature is amazing!) It is not until they get wet and there is sufficient moisture that they germinate. It can wreak havoc on your digestive system if you don’t soak them because these protective enzyme inhibitors do not digest in our bodies, your body will fight them, so you must soak them to release these toxins. Not soaking nuts first will also inhibit the absorption of nutrients. I suggest soaking overnight but 4 hours will do it.

You can top this with anything you like, I used strawberries, sunflower seeds and hazelnuts.

Ingredients

1 cup cashews
1 and quarter cup purified water
2 dates
2 tsp organic natural maple
1 tsp vanilla essence
2 probiotic capsules

Method

First, you must soak your cashews in purified water for AT LEAST 4 hours. Soak overnight if you can. Do not omit this step. (See above for explanation). Once the nuts are ready, drain and rinse, then put them in the blender with the water and blend for around 7-10 minutes. You need it to go super smooth and creamy. If you have a high-speed blender like a Vitamix, the mixture will heat up like a soup, don’t worry.

After around 4 minutes of blending, add the rest of the ingredients and proceed to blend until completely smooth like a yoghurt. Add more water if it’s too thick.

Store in a sealed container in the fridge (once it has cooled) for up to four days and enjoy with your favourite toppings.

Happy weekend everyone!
Love,
Lauren

Dark Green Juice for Dark London Days

Dark Green Juice

It’s a gloomy old day in London Town today, so I woke up and made a strong green juice to boost my immune system. I added Organic Burst Spirulina because it supports the immune system and is a rich, bio-available protein containing 18 amino acids.

Ingredients

Half a cucumber
4 sticks of celery
1 small bag of spinach
1 fennel bulb
1 tsp spirulina powder
Juice of 1 lime

Method

Juice all ingredients except spirulina and lime. Once juiced, add lime juice and mix in the spirulina. Add an ice cube to make it more refreshing!

Enjoy!
Love,
Lauren

Homemade Almond Milk

almond-milk

If you would like to read about why dairy is bad for you and why I don’t have it myself and why I don’t give it to my baby, read this article about why dairy is bad for you. I do not recommend replacing dairy with soy, even if you’re buying organic non-GMO soy products. Soy beans naturally contain isoflavones, which function as phytoestrogens. These mimic your body’s own oestrogen, therefore it’s as though you have increased oestrogen production. It’s never a good idea to mess around with your hormones. Furthermore, soy beans may have health benefits in their natural, whole state, but most of the dairy-replacement products made from soy are very processed. My rule of thumb is that processed is bad, and this is the major theory behind the “raw food” and “clean eating” movements. I don’t think that eating organic tofu once in a while will have a bad effect, but for most people whatever they use to replace dairy is something they will be eating every day. So you need to choose something which will contribute to your health, not hinder it!

For me, the best alternative to cow’s milk is almond milk. It’s just so damn yummy! The health benefits of almond milk include improved vision, weight loss, stronger bones and muscles, and a healthy heart. It helps to maintain ideal blood pressure and is good for your kidneys. Almond milk (or any other nut milk) is such a great substitute for cow’s milk that you won’t even miss it. In fact, once you’re used to having nut milk the taste of cow’s milk is quite unpleasant. 

Nut milk is really simple to make, and once it becomes part of your routine, no big deal, you’re ready to move onto the next step of cleaning up your diet 🙂

Ingredients

1 cup raw almonds
water for soaking
900ml purified water
1/4 tsp himalayan salt
1/4 tsp vanilla powder or 1/2 tsp vanilla extract
3 – 4 dried dates, or 1 tbsp raw honey or organic maple syrup

Method

Firstly, soak the almonds in water overnight or minimum 4 hours. Don’t skip this step! Almonds contain an enzyme which inhibits digestion so it’s important to soak them first. Drain the water off and rinse them.
Time-saving tip: if you own a dehydrator, soak a kilogram of almonds in one go and then dehydrate them. That way your almonds are pre-soaked and you can make milk without any forethought!

Now put all the ingredients in a blender, and blend well. In a high-speed blender 30 seconds is enough, but it may take longer in a regular blender.

Strain the liquid through a nut milk bag (available at health shops or online) or use a clean piece of cheesecloth or muslin. Keep refrigerated and use within 3 – 4 days. You could play around with flavour by adding cinnamon, or raw cacao powder for chocolate milk!

almond milk2

What you have left over after straining off the liquid is called almond pulp. In Raw food preparation we dry this out in a dehydrator to get almond flour (as opposed to store-bought almond flour, which is usually ground, blanched almonds.)

If you don’t have a dehydrator you can spread it out on a baking tray and put it in your oven on a low heat until it dries. Then process it in your blender to a fine flour. Keep in an airtight container. If you live in a very hot or humid place I recommend keeping it in the fridge. You can use this for gluten-free baking, as I do in my Banana Bread.

almond milk3

Health and happiness!

Love,
Lauren

Three Variations of Homemade Ice Cream

IMG_9364 (3)

I kid you not, homemade ice cream is the easiest thing to make! You need to have a good, high-speed blender like the Vitamix, and some fruit. That’s literally it!

Freeze bananas the day before, then add them to the blender. The super high speed turns the frozen bananas into cream without actually putting any cream in there, that is how simple it is!

Variation 1:
Just frozen bananas, topped with Chunky Monkey Cookie Dough Chunks

Variation 2:
Frozen bananas with two dates to make a banana caramel ice cream, topped with Raw Cacao Cookie bites

Variation 3:
Simple sorbet – frozen strawberries and raspberries topped with some raspberries.

You can top with date syrup, nuts, seeds, fruit, desiccated coconut – anything you like. My parents came over for dinner tonight and couldn’t believe it was completely and totally plant-based and guilt-free!

Happy ice cream eating!
Love,
Lauren ❤


On-The-Go-Lunch Wraps

Falafel wrap

We’re all busy running around and most of us don’t have the time to stand there cooking a fresh soup and home-baked gluten-free bread for lunch every day, but lunches should still be healthy, and they can be healthy and easy at the same time.

I used my vegan falafel and put them in a spelt flour wrap with leftover homemade tahini and lettuce. You can add whatever you want to it!

This is a great baby led weaning idea as you can just rip it all up and leave it on the tray in front of them!

Just a short post but hoping it inspires you to create healthy lunches for you and the kids!

Love,
Lauren