Courgette Pasta with Sauteed Mushrooms and Vegan Pesto

Zoodles

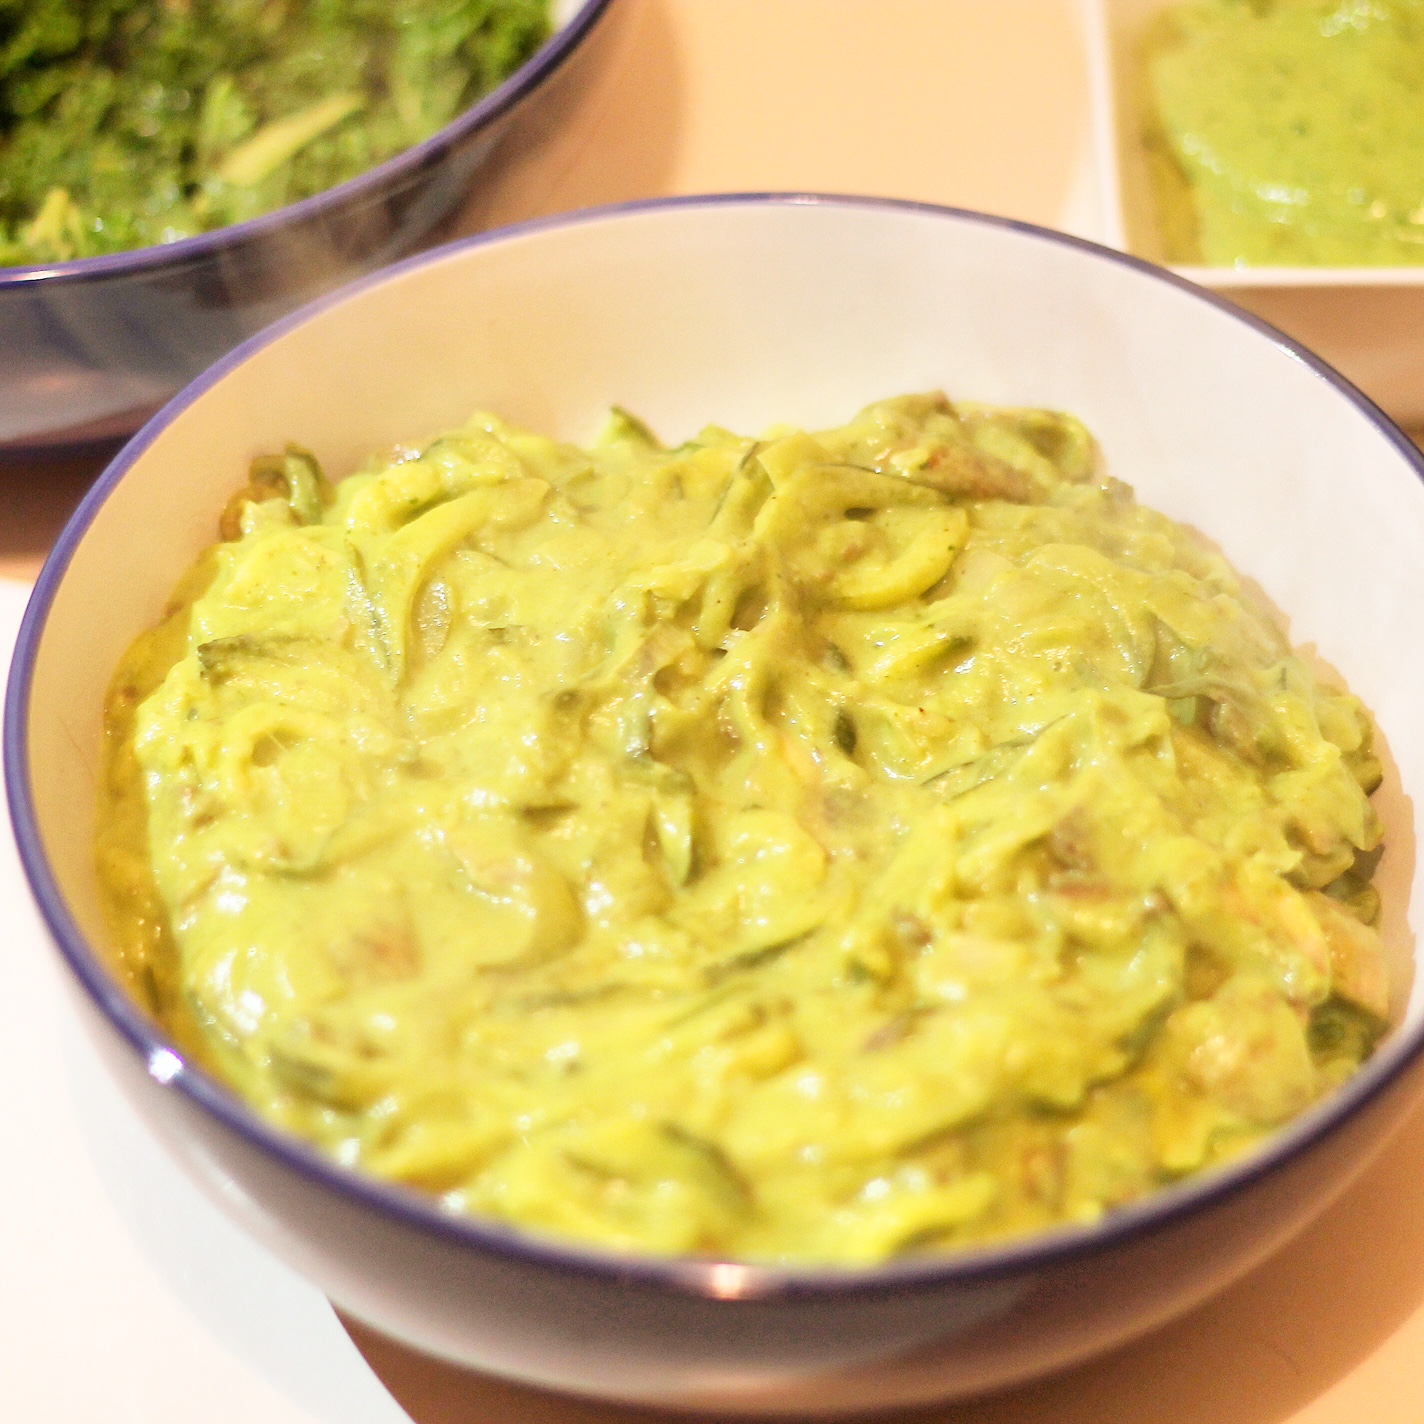
OK I may have gone a little overboard with the sauce, it’s just so yummy! But you may want to tone yours down and add less sauce, or as much as you want to get it as creamy as you like.

It seems that everyone is jumping on the spiralizer bandwagon these days which is great! All these utensils give us more resources to be able to cook healthily more often, and in less time. It honestly takes about 60 seconds to put two courgettes through a spiralizer. I decided to go for a tagliatelle shape this time. I had some mushrooms and leeks in the fridge along with my courgettes so decided to mix all three together and the result was delicious. Added to it my creamy Vegan Pesto, you can’t go wrong! Either as an accompaniment to a meal or as a meal itself with some salad – just yum!

Ingredients

2 courgettes (zucchini)
About 6/7 chestnut mushrooms or any smallish mushroom
1 leek
1 tsp extra virgin olive oil
Salt and pepper to taste
1 x vegan pesto recipe

Method

First spiralize your courgettes and set aside. If you don’t have a spiralizer you can use a potato peeler. (Spiralizers are quite cheap and really great to have around.)

Chop your mushrooms and leeks.

Heat some olive oil in a deep saucepan and when hot, add the mushrooms and leeks. Stir for a while, until the mushrooms start to release juices, then add a little salt and pepper. After about 7-10 minutes, once they smell delicious, gently pour away the excess liquid.

Put the saucepan back on the hob and add the courgette. Mix well, then add the pesto sauce and mix around until all is hot. Serve hot and sprinkle a few pine nuts on the top.

Enjoy!

Love,
Lauren

Original Arab Israeli Hummus

Original Hummus

Firstly, please excuse the poor quality of the picture; my husband took my camera to work so I’m using my phone and it’s a bit ‘shadowy’. Anyway, onto the important part! HUMMUS! I’ve already posted on here my Turmeric Hummus and Roasted Red Pepper Hummus recipes, but I thought I’d do plain, original hummus.

There is a place in Jaffa (Israel) where I go to every time I’m there. It’s run by Arab Israelis and if you didn’t know about it, you’d never go in because it looks like a dive! It’s one small room with wooden tables, plastic chairs and the only thing they serve is hummus and drinks! They make the hummus in the morning, early,  and they close when it runs out. You go in (no later than midday otherwise there’s none left) sit down, they ask what you want to drink and then bring you a plate of hummus and some pitta bread and you just sit there dipping away. It’s seriously the most amazing tasting hummus in the world and I’m trying to replicate it myself and this is the closes I have come…

Ingredients

2 tins organic chickpeas (drained and rinsed)
Quarter cup purified water
2 tbsp tahini paste
5 tbsp lemon juice
4 tbsp olive oil
Half tsp Himalayan salt
4 cloves garlic, minced

Method

Simply blend all ingredients together in a high speed blender until completely smooth – it really is as easy as that! Enjoy with gluten free bread, crackers, rice or quinoa cakes or veggies.

Enjoy!

Love,
Lauren

Roasted Cabbage Wedges

Roast Cabbage Wedges

My weekly Abel & Cole organic fruit and veg box often came with cabbages over the winter, which we love in my house, but I wanted to try and find something new to do with them and I found the easiest way to make them as yummy as possible! A great accompaniment for any meal…

Ingredients

1 cabbage, cut from the base into wedges
2 cups organic vegetable stock
1 onion or leek, whichever you have around, sliced
2 cloves garlic, crushed
Spoonful of olive oil

Method

Preheat the oven to 180.

Heat the olive oil in a pan then add the onion. Once it turns transparent, add the garlic and cook for about a minute before adding the cabbage wedges.

Let them brown on each side before turning over so you brown all sides just slightly before transferring them to an oven dish.

Once in the oven dish, pour the stock over then put in the oven for around 30-45 minutes.

So yummy!

Love,
Lauren

Mango Coconut Ice Cream

mango coconut ice cream

The last few mornings in Joburg have been quite chilly and I’m not at all happy to admit that autumn is definitely on its way. Use the last of our beautiful tropical summer fruit to make this quick and easy ice cream – no dairy or sugar! I’ve frozen it in lolly molds to make it fun for my son, but you could also freeze it as regular ice cream to be scooped on its own or to accompany a dessert.

Ingredients:

650g fresh mango flesh (about 2 mangoes)
1 tin (400ml) organic coconut milk
60ml organic virgin coconut oil
30ml raw honey
1/4 tsp himalayan salt
1/4 tsp organic vanilla powder or 1/2 tsp vanilla extract
1/4 tsp organic stevia leaf powder

Method:

Blend all the ingredients until smooth. Pour into lolly moulds and freeze, or process in an ice cream machine. If you don’t have an ice cream machine, freeze until almost set, then blend again to break up the crystals and return to the freezer.

mango coconut ice cream 2

Health & happiness!

Love,
Raine

Vegan Waffles (Gluten, dairy & refined-sugar free)

Waffles

I finally treated myself to a waffle maker and boy oh boy was it worth it! I had some ideas for gluten, dairy and sugar free waffle recipes so I started experimenting and today’s one came out perfectly… enjoy this, guilt free 🙂

Ingredients – (serves 2. For more, double ingredients)

1 and quarter cup buckwheat flour
1 cup almond milk
1 very ripe large banana
6 tbsp pure organic maple syrup
Pinch Himalayan salt

Method

Heat up your waffle iron and let it get really hot while you do the rest.

Put all the ingredients into a blender and blend until really well combined.

Gently pour some of the mixture into the waffle mould and shut lid slowly. I found they turned out best when left for 7-10 minutes.

Top with maple syrup or fruit of banana ice cream…

Love,
Lauren

Banoffee Pie

Banoffee Pie

Having special dietary requirements or wanting to stay in shape doesn’t mean that you can’t serve an impressive dessert at your next dinner party or family gathering. This raw pie is really quick and easy to make, and being free of refined sugar, dairy and wheat or gluten means you can even have it for breakfast! Who says you can’t have your cake and eat it too?

Ingredients

For the crust:
1 cup raw cashews or macadamias
1/2 cup raw almonds
1/2 cup desiccated coconut or homemade coconut flour
1/2 tsp organic vanilla powder, or 1 tsp vanilla extract
1/4 tsp himalayan salt
2 tbsp organic virgin coconut oil
1 tbsp organic maple syrup

1 x Raw Caramel recipe

For the cream:
1/2 cup organic coconut cream
1/4 cup raw cashews
2 tbsp organic virgin coconut oil
pinch of himalayan salt
pinch of organic vanilla powder, or 2ml vanilla extract

3 – 4 ripe bananas
1/3 cup of banana chips (I use Nature’s Choice, available at Dischem)

Method

Place all the ingredients for the crust into a food processor and blend until you have a fine crumb which sticks together when pressed. If it’s not sticking you can add another drizzle of coconut oil or maple syrup. Press the crust into a 20cm pie dish, covering the bottom and sides evenly. Prick with a fork and refrigerate until needed.

Make the raw caramel according to the recipe (click on the link above.) Spread about 2/3 of it onto the base of the pie.

Slice the bananas and place them on top of the caramel in concentric circles, until you have almost filled it to the top.

For the cream, place all the ingredients in a blender and blend until completely smooth. Pour the cream slowly over the banana, filling the pie to just below the edge of the crust.

Use a heavy-bottomed saucepan to crush the banana chips into crumbs, and sprinkle over the top of the pie. If you don’t have crispy banana chips (as opposed to chewy dried banana) you could use almonds or cashews to get the textural element. Drizzle some caramel over the top of the pie to finish. Refrigerate overnight or minimum 4 hours. This pie keeps well in the fridge for a few days.

Health & happiness!

Love,
Raine

Spirulina Smoothie

Green Spirulina Smoothie

I felt like I needed to be super-duper healthy today, so I picked up the greenest vegetables I could find in my fridge and stuck them in the juicer. Once I was done juicing them, I added them to the blender with a spoonful of spirulina and voila! Spirulina is so thick and icky if you don’t blend it – it can really put you off so make sure you blend it!

Read these amazing facts on spirulina, provided by the amazing Organic Burst where I buy all my superfoods:

  • Supports the immune system. Vitamin B6 and iron in our spirulina powder supports the immune system.
  • Healthy brain and cognitive function. Organic Burst Spirulina powder is rich in Vitamin B6 and contains iron that are known to support healthy cognitive function, in other words your brain power!
  • Weight management. Taken one hour before meals, Organic Burst Spirulina powder can naturally promote the feeling of fullness and prevent over-eating.
  • Healthy heart. Thiamine in Organic Burst Spirulina contributes to the normal function of the heart.
  • Rich, complete and digestible protein source. Spirulina powder is very rich in protein (60-70%), containing 18 amino acids including all essential amino acids. According to studies, spirulina has a very high protein efficiency ratio (PER). Protein in spirulina is four times more absorbable than protein in beef.

Ingredients

Big handful kale
Big handful spring greens
2 celery sticks
Half a cucumber
1 inch fresh ginger
1 lime
1 tsp spirulina

Method

Put all ingredients apart from spirulina and lime in the juicer. Once juiced, add to blender with the juice of one lime and the spirulina and blend on high for a minute with 4 ice cubes,

You are now positively buzzing and vibrating with healthy, clean cells!

Lauren 🙂

Chocolate Chai Baobab Smoothie Bowl

Chocolate Chai Baobab Smoothie Bowl

You all know how much I love a smoothie bowl, but up until now I hadn’t posted a chocolate one and let’s face it, everyone loves chocolate for breakfast! This way you don’t even have to feel guilty. The raw cacao is a sensational way of getting plant-based protein. I wanted to add some chai flavouring as I just love the taste and thought it would go well with this and it really did… The best ingredient in here is the Baobab. I’m a big fan of superfoods and have a cupboard where I keep spirulina, acai berries, maca, lucuma, cacao and now baobab. Read up on Raine’s explanation of Baobab here

Ingredients

1 frozen banana
Quarter cup boiling water
1 chai tea bag
Quarter cup almond milk
1 tbsp almond butter
2 dates
1 tbsp raw cacao
1 tsp baobab


Method

Before starting, boil the kettle and pour a quarter cup boiling water into a mug and let the chai tea bag steep in it for ten minutes. Put it next to a window so it cools down.

In the meantime, put the rest of the ingredients into a blender. Once the tea is cool, add this to the mix and blend well.

Pour into a bowl and add toppings of choice.

Enjoy!

Love,
Lauren

Vegan Dinner Plate

Veggie Plate

Just look how yummy life can be as a vegan! I’m not going to write a long post here, it doesn’t need it! Just going to get straight on to the recipes…

For the sweet potato mash:
Peel a sweet potato and boil. Once ready, mash it in a bowl with some almond milk, salt, pepper and sprinkle with paprika

For the brown rice:
Add half a cup of brown rice to boiling water. Once it starts bubbling, turn down the heat to low, give it a stir, and put the lid on. It will take a good half an hour to cook properly. You can also add a tsp of Bouillon or other organic vegetable stock for taste.

For the salad:
Drain and rinse a tin of chickpeas and add to a bowl.
Cut up a red onion, some cucumber and some dill and add to the bowl.
Drizzle with lemon juice, olive oil, Himalayan salt and pepper.

For the sauteed mushrooms:
Chop a box of mushrooms, one onion and one clove of garlic.
Add the onion to a non-stick frying pan with some coconut oil. After a minute add the garlic, then after another minute add the mushrooms. Sautee for around 7 minutes until you can smell they are ready – you’ll know what I mean! Add some salt and pepper and you can add paprika or other spices if you like.

Add all to a plate and enjoy!

Love,
Lauren

Dehydrated Snacks

Dehydrator mix

I’m a bit obsessed with my dehydrator… It’s just the best way to make tasty but healthy snacks. By dehydrating instead of baking, you keep all the nutrients in the snacks as they stay raw and you can increase your fruit and veg intake but they taste naughty!

Here I made kale chips, banana chips, dried mango and apple chips.

For kale:
Cut up small and cut off hard stalks and mix in a bowl with a little olive oil and a little Himalayan salt – not too much salt as the kale will shrink but the salt won’t so they’ll be really salty if you use too much. Also try Raine’s chocolate kale chips!

For banana chips:
Slice the banana (don’t use any brown bits) and coat with a little lemon juice to preserve

For the mango:
Cut up the pieces quite small and lay on the dehydrating tray – no preservative needed

For the apple:
Core the apple then slice it so you get nice round shapes. Only leave the skin on if they are organic and unwaxed. You can add a little cinnamon also.

Put in the dehydrator on 50-55 degrees and leave for 12 hours. The softer the food the longer it will take so you may need to take the apples and kale out before the mango and banana. Rotate the trays so they all get the hottest part when you can. Remember not to overlap any of the foods as they won’t go as crispy.

Easy yummy snacks for you and the kids!

Love
Lauren